NodeMCU is Lua based firmware for ESP8266. Long story short - instead of writing in C you are able to use Lua which allows for faster prototyping (at least in theory!).
Pre-requisites
Hardware
- ESP8266 - Olimex MOD-WIFI-ESP8266-DEV is best for development - fits on breadboard and leaves 2 rows of pins, while the NodeMcu Development Kit featuring integrated serial to usb cover a whole breadboard and you need to use jump wires instead of dupont wires. The other modules suitable for development are ESP-7, ESP-8 and ESP-12, but they don’t fit on standard breadboard so you want to order some adapter plates.
- USB-UART cable - any serial cable should do, but there are some modules with integrated 3V3 power supply
- Power supply - it’s best to obtain a combined 3.3V and 5V power supply as some components require 5V.
- AC-DC adapter or USB cable - 5V@500mA or better, preferably 9V@1A. The ESP itself consumes up to 300mA so make sure you have enough supply or you will experience very strange behavior from the ESP.
- Breadboard - any size will suffice
- Dupont wires or Jump wires - mostly male-to-male, but some male-to-female should be available
- [OPT] Logic Level Converter - the more channels the better and definitely two-way
- [OPT] Switch buttons - just to ease entering flash mode and restart. The NodeMcu DevKit has those integrated
Software
- Text editor - anyone (except Notepad due to it’s notorious BOM). I’m big fan on Atom IDE so you may give it a try.
- Serial Terminal - PuTTY for win, picocom available in dep repos, mac - ???
- luatool - for loading lua files
- esptool - for burning images
- NodeMCU - just take the latest build
Setting up
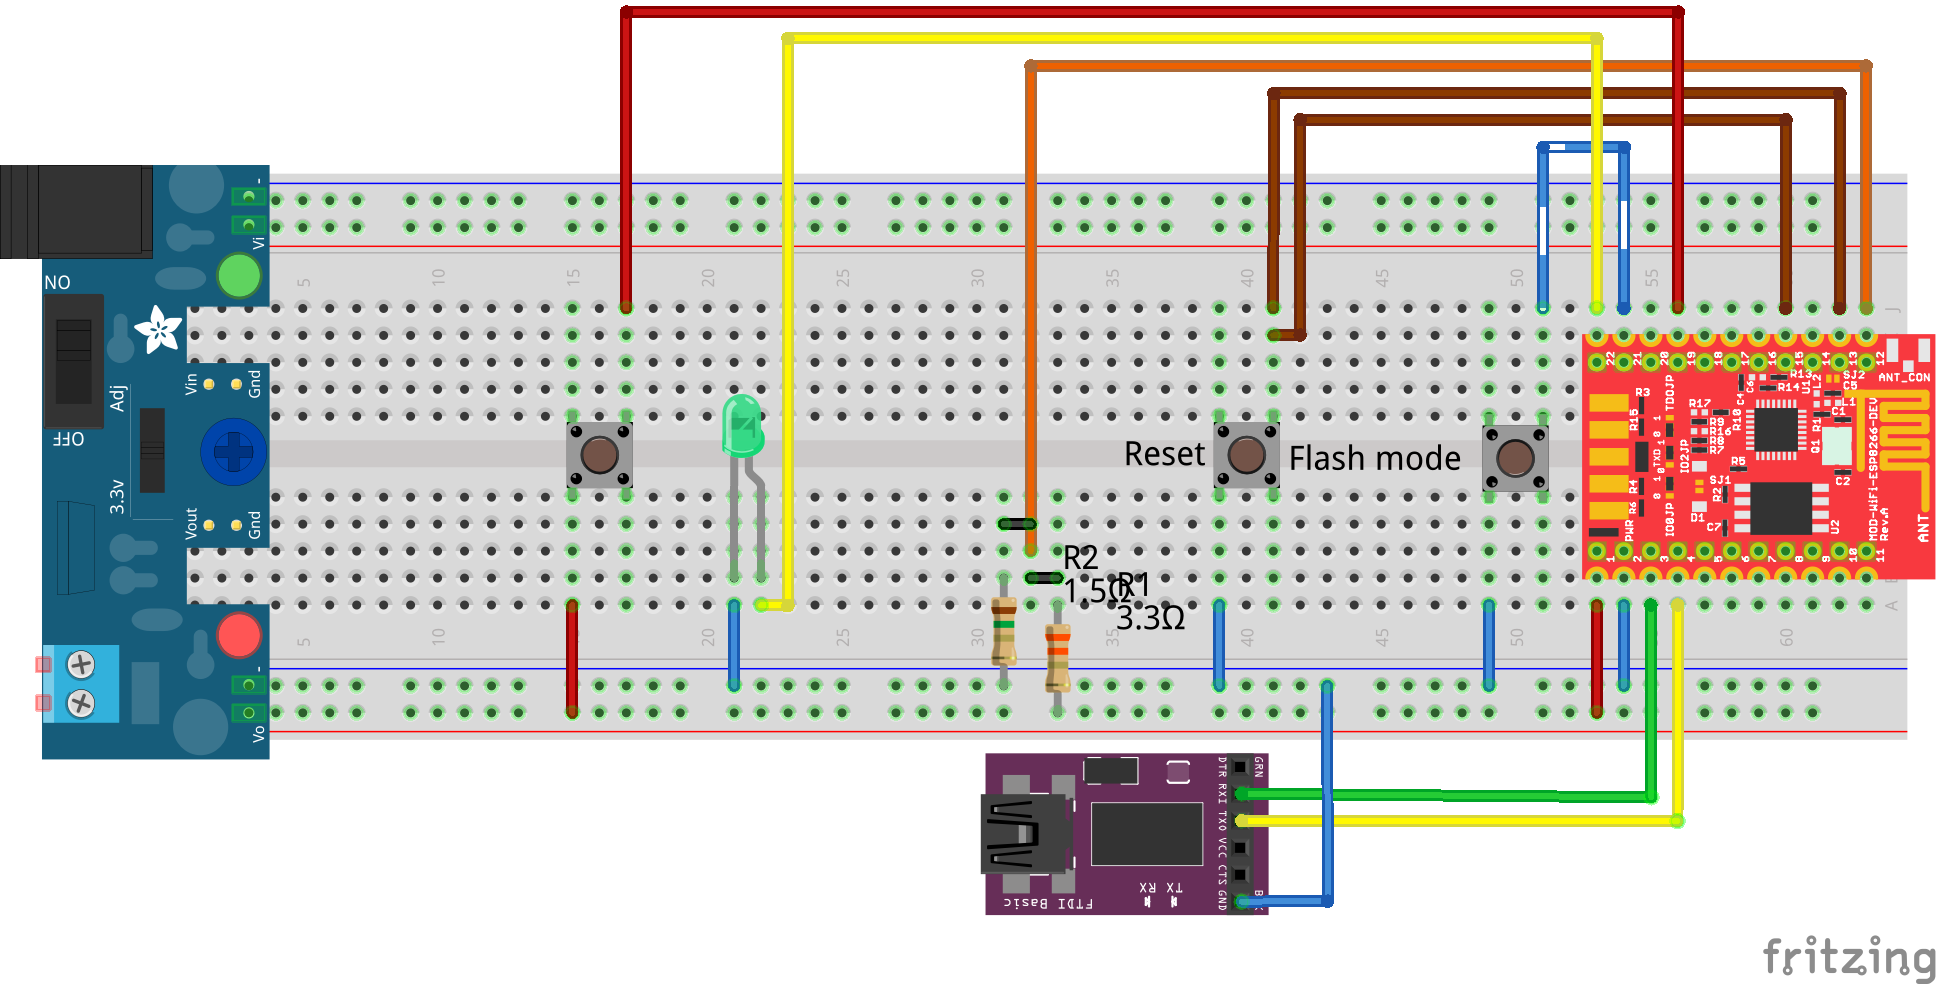 Get the Fritzing file
The most important things to wire are (for Olimex module):
- Pin 1: 3.3V - power supply +3.3V
- Pin 2: GND - power supply GND
- Pin 3: GPIO1 - connect to UART TX
- Pin 4: GPIO3 - connect to UART RX
On ESP-7,-8 and -12 you need to connect
- Pin 3: CH_PD - power supply +3.3V
- Pin 8: VCC - power supply +3.3V
- Pin 9: GND - power supply GND
- Pin 15: RXD - connect to UART TX
- Pin 16: TXD - connect to UART RX
Flashing NodeMcu
- Download the latest release. Integer version seems more stable for the moment.
- Connect GPIO0 (pin 21 on Olimex module) to power supply GND to enter flash mode
- Power on or restart the ESP module
Flash the downloaded firmware
1
esptool.py write_flash 0x00000 nodemcu_integer_0.9.6-dev_20150331.bin
Start your terminal at baudrate 9600bps
1
picocom -b 9600 /dev/ttyUSB0
Hit
Enter- You should see the lua prompt
1
>
Now you’re ready to start develop.